
Here’s something nobody told you when you started stretching every morning hoping to touch your toes: your muscles were never the real obstacle. The tissue that’s actually holding you back is your fascia, the dense connective webbing wrapped around every muscle, joint, and bone in your body. And fascia doesn’t respond to a quick 20-second stretch. It needs time, patience, and stillness. That’s the entire idea behind yin yoga poses for beginners, and it’s why this practice has quietly become one of the most searched wellness terms of the past two years.
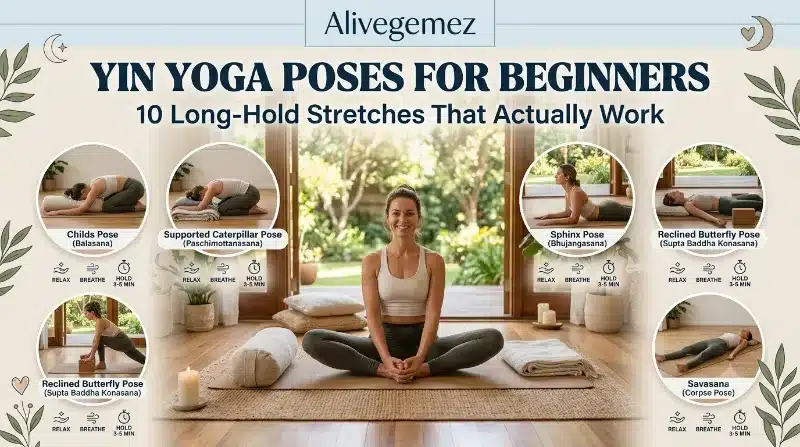
I’ve taught yin yoga for over a decade, and the question I hear most often from new students is simple: “Why do we just sit here for five minutes?” By the end of this guide, you’ll understand exactly why, plus you’ll have 10 beginner-friendly yin yoga poses, hold times, a full sequence, and enough practical detail to start tonight.
Key Takeaways
| What You’ll Learn | Quick Answer |
|---|---|
| What makes yin yoga different | Poses held 2–5 minutes to target fascia and deep connective tissue |
| Best poses for beginners | Butterfly, Child’s Pose, Dragon, Sphinx, Caterpillar, and 5 more below |
| Ideal hold time | 3–5 minutes per pose, less for tight areas or beginners |
| Best time to practice | Evening, or after a workout when muscles are already warm |
| Who should modify or skip | Anyone with joint replacements, acute injuries, or pregnancy (see safety section) |
TL;DR: Yin yoga uses long, passive holds (usually 3–5 minutes) to stretch connective tissue and calm your nervous system, unlike faster-paced yang styles like vinyasa. For beginners, start with 5–7 poses, hold each for 2–3 minutes, and breathe slowly through mild discomfort while never pushing into sharp pain. The 10 poses below plus the sample sequence at the end give you everything you need for your first session.
What Is Yin Yoga, Really
Yin yoga was developed in the late 1970s by martial artist Paulie Zink, then refined and popularized by teachers Paul Grilley and Sarah Powers, who combined Zink’s Taoist yoga forms with modern anatomy and traditional Chinese medicine concepts. Grilley’s key insight, based on his study of anatomy under Dr. Hiroshi Motoyama, was that flexibility differs from person to person based on actual bone structure, not just muscle tightness. That’s why two people in the exact same pose can look completely different, and both can still be correct.
Where yang styles like vinyasa or power yoga move quickly and work muscles, yin yoga slows everything down and works the deeper layers: fascia, ligaments, and joint capsules. You hold each pose for several minutes without much muscular effort, letting gravity and time do the work instead of strength.
If you want a broader look at how this fits into a full practice, our pillar guide on advanced yoga poses breaks down how yin and yang styles work together over the long term.
Yin vs Yang Yoga at a Glance
| Feature | Yin Yoga | Yang Yoga (Vinyasa, Power) |
|---|---|---|
| Hold time | 2–5 minutes | 5–30 seconds |
| Target tissue | Fascia, ligaments, joints | Muscles |
| Muscle engagement | Minimal, passive | Active, dynamic |
| Pace | Slow, meditative | Fast, flowing |
| Best for | Flexibility, stress relief, recovery | Strength, cardio, stamina |
The Real Benefits of Yin Yoga (Not the Fluffy Kind)
Long holds trigger changes that shorter stretches simply can’t reach. Research on fascia and connective tissue, popularized by anatomist Thomas Myers, suggests fascia responds to sustained load rather than quick movement, which is exactly why yin practitioners hold poses far longer than a typical warm-up stretch.
Here’s what consistent practice actually does:
- Improves joint mobility in the hips, spine, and shoulders, the three areas that stiffen fastest from sitting
- Lowers cortisol and activates the parasympathetic nervous system, which is why most students describe yin as “accidentally meditative”
- Increases circulation to cartilage and ligaments, tissue that gets far less blood flow than muscle
- Builds mental patience, since sitting in mild discomfort for three minutes without fidgeting is its own skill
- Complements strength or cardio training by restoring range of motion that heavy lifting or running gradually tightens
One client of mine, a 47-year-old marketing manager who’d sat at a desk for two decades, could barely bring her knees to the floor in a simple seated twist during her first session. After eight weeks of two yin sessions per week, she was folding into Dragon Pose without a prop under her hip. Nothing dramatic happened overnight. Progress in yin yoga is slow, and that’s actually the entire point.
The 10 Best Yin Yoga Poses for Beginners
Below are 10 long-hold yoga poses that form the backbone of nearly every beginner yin yoga sequence. Hold each for 2–3 minutes if you’re new, working up to 5 minutes as your body adapts.
1. Butterfly Pose (Baddha Konasana Variation)
Sit with the soles of your feet together, knees falling open, then fold forward from your hips rather than rounding your upper back. This targets your inner thighs, groin, and lower back.
Hold time: 3–5 minutes
Beginner tip: Place a folded blanket under your hips if your knees sit higher than your hips.
2. Child’s Pose (Balasana)
Kneel, sit back onto your heels, and stretch your arms forward while resting your forehead on the mat. This gently opens your hips, thighs, and lower back while calming your nervous system almost instantly.
Hold time: 3–5 minutes
Beginner tip: Widen your knees if your belly feels compressed.
3. Caterpillar Pose
Sit with legs extended straight in front of you, then fold forward, letting your spine round completely instead of keeping it flat. This is a deep hamstring and lower back release that most desk workers desperately need.
Hold time: 3–5 minutes
Beginner tip: Sit on a folded blanket to tilt your pelvis forward if your hamstrings are very tight.
4. Dragon Pose (Low Lunge Variation)
Step one foot forward into a deep lunge, lower your back knee to the mat, and let your hips sink forward and down. Dragon Pose is one of the most effective hip flexor stretches in any yoga style. If your hips tend to stay tight, our guide on pigeon pose for tight hips pairs perfectly with this one.
Hold time: 3 minutes per side
Beginner tip: Place a block under your hands for support if reaching the floor strains your shoulders.
5. Sphinx Pose
Lie on your stomach and prop yourself onto your forearms, keeping your pelvis heavy on the mat. This is a gentle backbend that targets your lower spine without the intensity of a full Cobra Pose.
Hold time: 3–5 minutes
Beginner tip: Keep your elbows directly under your shoulders to protect your lower back.
6. Seal Pose
A deeper variation of Sphinx, Seal Pose has you straighten your arms while keeping your hips grounded, creating a stronger backbend. This shouldn’t be attempted until Sphinx feels easy.
Hold time: 2–3 minutes
Beginner tip: Skip this one entirely if you have any lower back injury history; Sphinx alone is enough.
7. Reclining Twist
Lie on your back, draw one knee across your body while keeping your shoulders on the mat, and let gravity pull your knee toward the floor. This targets your spine, obliques, and lower back simultaneously.
Hold time: 2–3 minutes per side
Beginner tip: Place a pillow under your bent knee if it doesn’t reach the floor comfortably.
8. Sleeping Swan (Pigeon Variation)
From a tabletop position, bring one knee forward toward your wrist and extend the opposite leg straight back, then fold forward over the front leg. This is one of the deepest hip openers in yoga.
Hold time: 3 minutes per side
Beginner tip: Sit on a cushion under your hip if it doesn’t touch the mat.
9. Half Frog Pose
Lying on your stomach, bend one knee and reach back to hold your foot, gently drawing your heel toward your glute. This targets your quadriceps and hip flexors together.
Hold time: 2–3 minutes per side
Beginner tip: Use a strap around your ankle if your hand can’t reach your foot yet.
10. Supported Fish Pose
Lie back over a bolster or stacked pillows placed under your shoulder blades, letting your chest open and your arms rest out to the sides. This counters the forward-hunched posture most of us carry all day.
Hold time: 3–5 minutes
Beginner tip: Keep a small pillow under your head if your neck feels strained.
A Complete Yin Yoga Sequence for Beginners
Here’s a full yin yoga sequence you can follow start to finish, roughly 35–40 minutes total.
| Order | Pose | Hold Time | Target Area |
|---|---|---|---|
| 1 | Child’s Pose | 3 min | Hips, lower back |
| 2 | Butterfly | 4 min | Inner thighs, groin |
| 3 | Dragon (both sides) | 3 min each | Hip flexors |
| 4 | Sleeping Swan (both sides) | 3 min each | Outer hips, glutes |
| 5 | Caterpillar | 4 min | Hamstrings, spine |
| 6 | Sphinx | 4 min | Lower spine |
| 7 | Reclining Twist (both sides) | 2 min each | Spine, obliques |
| 8 | Supported Fish | 4 min | Chest, shoulders |
Practice this two to three times a week, ideally in the evening when your body is naturally cooler and less prone to overstretching from adrenaline. If you want to build toward more demanding poses later on, our tutorials on crow pose, headstand for beginners, and shoulder stand safety are natural next steps once your hips and spine have more range.
The Science Behind Long Hold Yoga Poses
You might be wondering why 90 seconds isn’t enough and why yin insists on 3, 4, even 5 minutes. Fascia is mostly collagen, and collagen responds to sustained mechanical stress far more than brief force. A quick stretch mainly signals your nervous system to relax the muscle temporarily. A long hold actually reorganizes the collagen fibers themselves over weeks and months of consistent practice.
Hold Time vs. Tissue Response (approximate)
30 sec  |███              Mostly nervous system relaxation
90 sec  |███████          Muscle begins to lengthen
3 min   |███████████████  Fascia and connective tissue engaged
5 min   |█████████████████ Deepest fascial and joint capsule release
This is exactly why rushing through a yin pose defeats the purpose. If you’re breathing hard, gripping, or shaking, you’ve likely gone past your body’s actual range and into forced flexibility, which does more harm than good over time.
Passive Yoga Stretches: How to Actually Relax Into Them
The hardest part of yin yoga isn’t physical, it’s mental. Most beginners instinctively tense their muscles the moment they feel discomfort, which defeats the entire purpose of a passive stretch. Here’s how to actually let go:
- Find your edge, not your limit. You should feel a clear stretch at roughly 60–70% of your maximum range, never sharp pain.
- Soften your face and hands first. Tension almost always shows up in the jaw and fingers before anywhere else.
- Breathe slowly and evenly, ideally through your nose, keeping your exhale slightly longer than your inhale.
- Reassess every 60 seconds. As your fascia releases, you’ll often be able to fold slightly deeper without forcing anything.
- Come out slowly. Never snap out of a long hold; your joints need a few seconds to readjust.
Pairing Yin Yoga With the 4-7-8 Breathing Technique
Breath is half of what makes a passive stretch actually work, and this is where the 4-7-8 breathing technique becomes genuinely useful during your yin practice. Developed by Dr. Andrew Weil and based on an ancient pranayama practice called pranayama breathing, the technique works like this: inhale quietly through your nose for 4 counts, hold your breath for 7 counts, then exhale slowly through your mouth for 8 counts.
Using 4-7-8 breathing during your first minute in a pose like Butterfly or Dragon does two things at once. It extends your exhale, which naturally triggers your parasympathetic nervous system, and it gives your mind something specific to focus on instead of counting down the seconds until the pose ends. Most students find that after two or three rounds of 4-7-8 breathing, their body sinks noticeably deeper into the stretch without any extra effort at all.
You don’t need to use this breathing pattern for the entire hold. One to three rounds at the start of each pose is enough to shift your nervous system into a more receptive state, after which you can return to slow, natural breathing for the rest of the hold.
Safety: Who Should Modify or Skip Yin Yoga
Yin yoga is gentle, but “gentle” doesn’t mean “risk-free.” Please modify or avoid deep holds if any of the following apply to you:
- Hypermobility or joint hypermobility syndrome: long holds can overstretch already-loose ligaments
- Recent joint replacement or surgery: always get clearance from your surgeon first
- Pregnancy: avoid deep twists and prone poses like Sphinx or Seal; seek pregnancy-specific modifications
- Acute injury or inflammation: wait until swelling and pain subside before resuming stretches in that area
- Osteoporosis: avoid deep spinal flexion poses like Caterpillar without medical guidance
According to general guidance from the National Center for Complementary and Integrative Health, gentle yoga styles are generally considered low-risk for most healthy adults, but anyone with existing joint or spinal conditions should consult a physician before starting a new stretching routine.
When to Practice Yin Yoga for Best Results
Evening practice works best for most beginners since your body is naturally warmer and looser after a day of movement, and the slow pace helps transition your nervous system toward sleep. Practicing right after strength training or running also works well, since your muscles are already warm and your fascia is more pliable.
Avoid practicing yin yoga first thing in the morning if you’re very stiff, since cold connective tissue is more prone to overstretching. If mornings are your only option, add five minutes of gentle movement first.
Frequently Asked Questions
How long should a beginner hold a yin yoga pose?
Start with 2 to 3 minutes per pose and gradually build toward 5 minutes as your body adapts over several weeks.
Is yin yoga good for beginners or only advanced practitioners?
Yin yoga is excellent for complete beginners specifically because it requires no strength or prior flexibility, only patience and slow breathing.
Can yin yoga replace strength training?
No. Yin yoga improves flexibility and joint health, but it doesn’t build muscular strength, so it works best alongside, not instead of, resistance training.
Why does yin yoga sometimes feel emotional?
Long holds in areas like the hips can release physical tension that’s been stored for years, and many students report unexpected emotional release during or after deep hip-opening poses.
How often should I practice yin yoga per week?
Two to three sessions per week is enough to see meaningful improvements in flexibility and stress levels within about six to eight weeks.
For a deeper breakdown of pose modifications and prop usage, this detailed yin yoga practice guide is worth reading alongside this one, and this beginner’s complete guide covers additional anatomical considerations. For a broader library of pose breakdowns, this yin yoga pose collection is a solid reference too.
Quick Quiz: Test What You’ve Learned
1. How long should a beginner typically hold a yin yoga pose?
A) 10–20 seconds
B) 2–3 minutes
C) 15 minutes
2. What tissue does yin yoga primarily target?
A) Muscles only
B) Fascia and connective tissue
C) Bone density
3. Which pose targets the hip flexors most directly?
A) Dragon Pose
B) Supported Fish
C) Reclining Twist
4. What should you do if you feel sharp pain during a hold?
A) Push through it, that’s the point
B) Ease out of the pose immediately
C) Hold your breath and wait it out
5. What’s the ideal time of day to practice yin yoga?
A) First thing in the morning, cold
B) Evening or after a workout
C) It doesn’t matter at all
Answers: 1. B — 2. B — 3. A — 4. B — 5. B
Bringing It All Together
Yin yoga poses for beginners aren’t about touching your toes on day one. They’re about giving your body’s deepest tissue the time it actually needs to change, something almost no other form of exercise offers. Start with three or four poses from this list, hold each for two to three minutes, breathe slowly, and let your body do what it’s designed to do when you finally stop rushing it. Six weeks from now, poses that feel impossible today will feel like home.
References
- Grilley, Paul. Yin Yoga: Principles and Practice
- Powers, Sarah. Insight Yoga
- Myers, Thomas. Anatomy Trains: Myofascial Meridians for Manual and Movement Therapists
- National Center for Complementary and Integrative Health, general guidance on yoga safety
- Mindfully Yin – Yin Yoga Practice Guide
- Arhanta Yoga – Yin Yoga for Beginners
- Yin Yoga Foundation – Pose Library